

For an adult t-shirt, design your full-front or full-back graphic at 12 × 16 inches and your left-chest logo at 3.5 to 4 inches wide. Build every file at 300 DPI, which means that 12 × 16 inch print translates to 3,600 × 4,800 pixels on your canvas. Always confirm the exact template against your printer’s specs before you hit export, since maximum print areas shift slightly by shirt style and equipment.
TL;DR:
- Designing at 300 DPI with exact pixel dimensions for your print size ensures sharp details and minimizes rejection risks.
- Full-front and back designs should be around 12 × 16 inches, while left-chest logos are best kept at 3.5 to 4 inches wide.
- Convert inches to pixels by multiplying by 300 DPI to create files that match print requirements, avoiding upscaling small images.
- Position artwork 2 to 3 inches below the collar for front, and 4 to 6 inches from collar for back designs for proper placement.
- Shaysprintshop standardizes on these sizing standards, checking small garment sizes before production to ensure design consistency across sizes.
Table of Contents
- What Are the Standard T-Shirt Print Size Dimensions by Placement?
- How Do You Convert Inches to Pixels for T-Shirt Printing?
- Where Should a Design Sit on a T-Shirt?
- Does Shirt Size Change How Big the Print Should Be?
- How Do You Export a Print-Ready T-Shirt File?
- How Shay’s Print Shop Handles Sizing and Placement
- Quick Preflight Checklist Before You Upload
- Why Exact Pixel Targets Beat Vague Sizing Advice
- Ready to Print? Here’s Where Shaysprintshop Fits
- Sources
- FAQ
What Are the Standard T-Shirt Print Size Dimensions by Placement?
You’ll lose fewer proofs to rejection if you pick the right starting size before you ever open your design software. Placement drives everything else: how big the art can be, how it reads from three feet away, and whether it survives a wash cycle without cracking at the seams.
Here’s how the standard t-shirt print size guide breaks down by placement on an adult shirt:
- Full-front (center chest to waist): 10 to 14 inches wide, with 12 × 16 inches as the reliable default for most adult tees.
- Full-back: similar size range as full-front, often near 12 inches wide, with some printers allowing slightly larger dimensions.
- Center chest (smaller front placement): 6 to 10 inches, a common choice for logos that don’t need to dominate the shirt.
- Left chest: about a few inches wide, the classic pocket-logo footprint.
- Sleeve: a few inches wide, limited by the narrow fabric strip and any seams running through it.
- Youth and toddler: 8 to 12 inches for youth full-front, scaling down further for toddler sizes since the printable torso area shrinks fast below a youth medium.
Ladies’ cut and fitted styles often have a narrower torso than unisex shirts, so the same 12-inch-wide design can crowd the side seams on a fitted small. Oversized and streetwear-style shirts flip that problem: designers sometimes stretch full-front art past 14 inches to fill the extra fabric, or run all-over prints that ignore standard placement boundaries entirely. Because print-area size charts vary between shops, treat every number here as a strong starting point, not a fixed law. Pull up your specific printer’s template before finalizing an order, especially if you’re working across multiple garment styles in one run.
How Do You Convert Inches to Pixels for T-Shirt Printing?
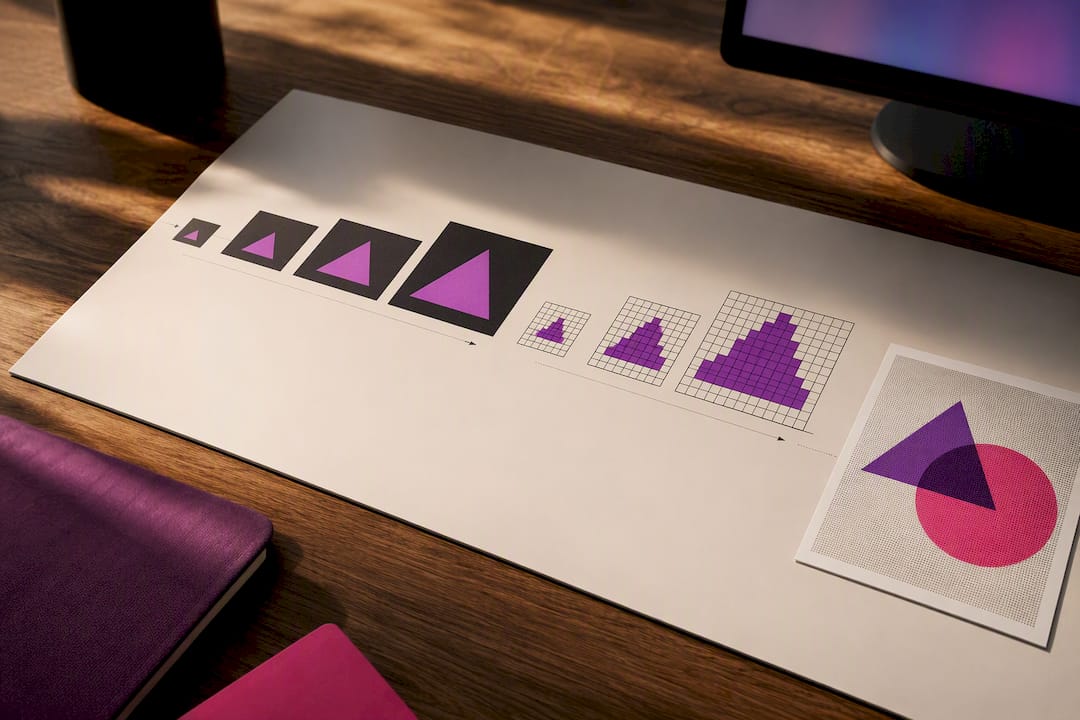
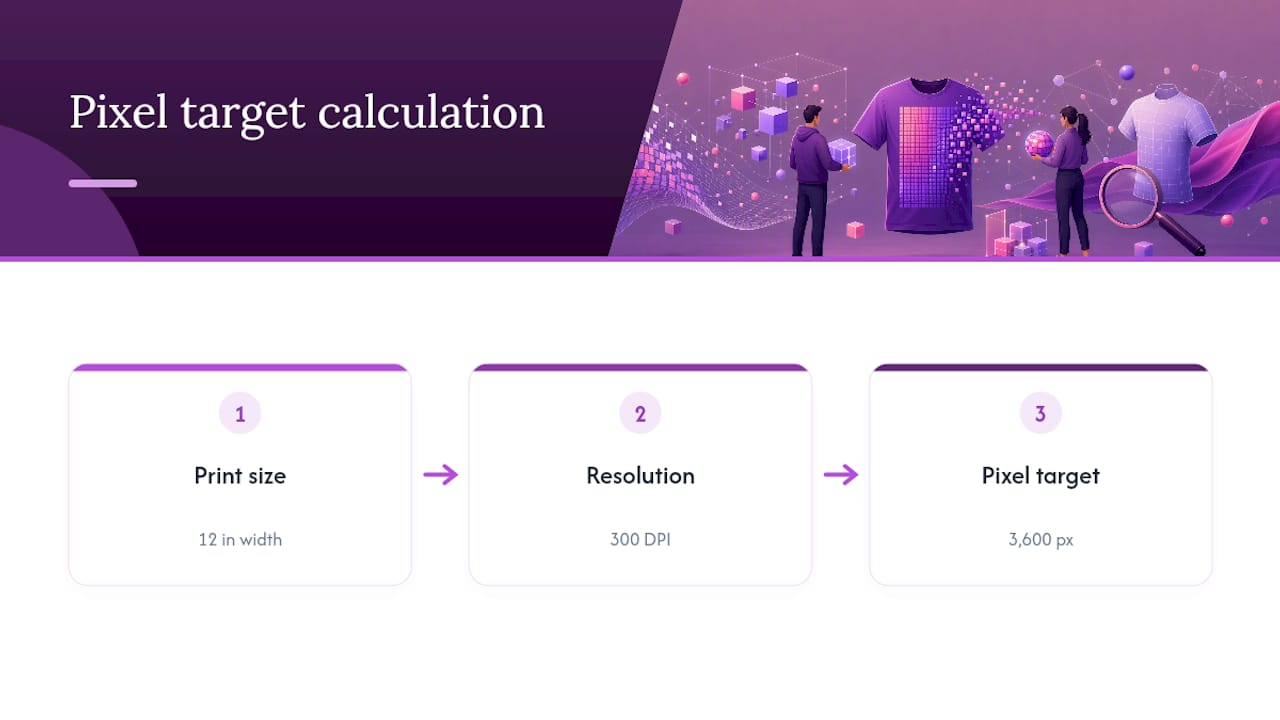
The math is simple: multiply your print width and height in inches by your target DPI (dots per inch), and you get the exact pixel dimensions your file needs. A 12 × 16 inch print at 300 DPI works out to 3,600 × 4,800 pixels, and that formula holds for any placement once you know the inch size you’re targeting.
Three hundred DPI is the number to build toward. It’s the resolution that keeps fine lines and small text crisp on both screen-printed and DTF-transferred designs, and it’s what most shops list as their recommended image resolution. Direct-to-garment (DTG) printers are more forgiving, often accepting a 150 DPI minimum, but that’s a floor to avoid, not a target to aim for.
| Placement | Print size (inches) | Pixels at 300 DPI | Pixels at 150 DPI |
|---|---|---|---|
| Adult full-front/back | 12 × 16 in | 3,600 × 4,800 px | 1,800 × 2,400 px |
| Left chest | 4 × 4 in | 1,200 × 1,200 px | 600 × 600 px |
| Sleeve | 3 × 3 in | 900 × 900 px | 450 × 450 px |
| Youth full-front | 10 × 12 in | 3,000 × 3,600 px | 1,500 × 1,800 px |
Pro Tip: Never upscale a small file to hit these numbers. Stretching a 600 × 600 pixel logo up to 1,200 × 1,200 just blurs the pixels that are already there; start with source art large enough to hit the target natively, or rebuild it as vector art.
Vector formats (SVG, EPS, AI) sidestep the whole DPI conversation because they scale infinitely without quality loss, which makes them the safer bet for logos and text. Raster formats like PNG still dominate for photo-based or painterly designs, and that’s where hitting exact pixel counts actually matters. Print-on-demand creators report conflicting pixel requirements across different platforms, so treat the table above as a strong baseline and verify against your specific printer’s upload requirements before finalizing a file.
Where Should a Design Sit on a T-Shirt?
Getting the size right doesn’t help if the artwork lands in the wrong spot. Placement rules are less standardized than pixel math, but the ranges below cover what most shops and DTF/DTG operators expect.
- Full-front vertical offset: Start the design 2 to 3 inches below the collar seam, which keeps it clear of the neckline while still reading as centered.
- Full-back vertical offset: Drop it further, 4 to 6 inches below the collar, since back designs typically sit lower and larger than front ones.
- Left-chest horizontal position: Roughly 3 to 4 inches in from the shirt’s center line, mimicking where a polo logo would sit.
- Left-chest vertical position: About 7 to 8 inches down from the shoulder seam, though this shifts slightly depending on whether the shirt has a crew or V-neck collar.
- Centering method: Center the art within the garment’s actual printable area, not the raw fabric width. Fitted and oversized cuts distribute fabric differently, so garment-center and print-area-center aren’t always the same point.
Watch out for seams and pockets. A design that crosses a side seam or overlaps a chest pocket will either wrinkle unpredictably during printing or get rejected outright by the production team. If your shop offers digital mockups before production, use them. A flat file can look perfectly centered on your screen and still sit crooked once it’s mapped onto a curved chest panel, which is exactly why logo placement specs matter as much as the pixel count itself.
Does Shirt Size Change How Big the Print Should Be?
The smallest garment in a bulk order usually sets the ceiling for everyone else. If you’re printing the same design across small through 3XL, the printable chest area on that small shirt is narrower than on the 3XL, and pushing a 14-inch-wide design onto a size small often means the art bleeds off the side seams.
Most shops handle this one of three ways:
- Scale down proportionally for the smallest sizes while keeping the design centered and legible.
- Crop or simplify dense designs so small text and fine detail don’t disappear once the art shrinks.
- Supply multiple file sizes, one calibrated for youth or small adult sizes and another for the standard run, when the size spread is wide enough to matter.
Youth and 2XL-plus sizes are the two ends of the spectrum most likely to need their own file. A design sized perfectly for a men’s large will often look cramped on a youth medium and undersized on a 3XL, so building at least one alternate size when your order spans that range keeps the finished shirts visually consistent. Print-on-demand platforms generally standardize around an M/L template near 12 × 16 inches, which is worth matching if you’re designing for a storefront rather than a single bulk batch.
How Do You Export a Print-Ready T-Shirt File?
Getting the dimensions right is only half the job. A perfectly sized design still gets rejected if the file format, color profile, or canvas setup is off. Run through this sequence before you upload anything:
- Set your artboard to the exact print size at 300 DPI. For a 12 × 16 inch full-front, that’s a 3,600 × 4,800 pixel canvas from the start, not something you resize after the fact.
- Choose the right export format. Export raster art as a PNG with a transparent background so the shirt color shows through anywhere the design doesn’t cover. Export logos and typography as vector PDF or SVG whenever your printer accepts them.
- Use sRGB color unless your printer specifies a different profile. Screen colors and printed colors won’t match exactly, but sRGB keeps the gap predictable.
- Trim excess canvas. Extra transparent padding around your design can confuse automatic placement tools and throw off the actual print size.
- Include layered source files (PSD or AI) if your shop asks for them, since it lets a production team make small fixes without starting over.
- Follow the printer’s naming convention for uploads, especially on bulk orders where mismatched file names cause mix-ups between different designs.
Pro Tip: Flatten a copy of your file for upload, but keep the layered original on hand. If a proof comes back with a color shift or a sizing tweak needed, you’ll fix it in minutes instead of rebuilding from scratch.
Choosing between file formats gets easier once you know which printing method your shop uses. DTF and DTG have different tolerances for fine detail and color layering, and matching your file format to the print method upfront avoids a lot of back-and-forth on revisions.
How Shay’s Print Shop Handles Sizing and Placement
Shay’s Print Shop builds every job around the same 300 DPI standard covered above, and our DPI and pixel-size breakdown walks through the exact numbers our production team checks before anything goes to press.
For bulk orders spanning multiple sizes, we flag the smallest garment in the run early and confirm whether the design needs a scaled-down version or holds up as-is. That check happens before production starts, not after a batch of small shirts comes back with cropped edges.
A few things worth knowing before you order:
- Some shops print on 100% cotton shirts using DTF, which tends to hold fine detail better than some DTG setups on darker fabric.
- Our 10-shirts-for-$99 custom t-shirt package covers event, business, and family reunion orders where you need consistent sizing across a group.
- Left-chest and pocket placements follow the same offset guidelines detailed above, and our pocket-print guide covers the specifics for smaller-format logos.
Quick Preflight Checklist Before You Upload
- Artboard matches your target inches at 300 DPI, with no extra canvas padding.
- Color profile is set (sRGB unless your printer specifies otherwise) and the background is transparent for raster files.
- Placement offsets are confirmed and the design doesn’t cross an unsupported seam.
- Both a flattened export and a layered source file are ready if your shop asks for one.
Why Exact Pixel Targets Beat Vague Sizing Advice
Most t-shirt design guides tell you to “design at high resolution” without ever naming a number, which leaves hobbyists and small shop owners guessing right up until a file gets rejected. The pixel math in this guide isn’t complicated. Twelve inches times 300 DPI is 3,600 pixels, every time, and that certainty is worth more than any amount of general advice about “print quality.”
Where the conventional wisdom falls short is placement, not sizing. Plenty of resources will tell you the inch dimensions for a chest logo but skip the vertical offset entirely, and that’s the detail that actually determines whether a design looks intentional or slightly off. A left-chest logo at the right width but the wrong height down from the collar still reads as a mistake.
If you take one thing from this guide, make it the build-at-print-size habit. Set your canvas to the actual inches at 300 DPI before you draw a single line, rather than designing loose and resizing later. It removes the guesswork that causes most reprint requests, and it’s the single habit that separates a smooth order from a frustrating one.
— Jon Will
Ready to Print? Here’s Where Shaysprintshop Fits
You’ve got the pixel math and placement rules down. Shaysprintshop is the shop that turns those specs into finished shirts without making you chase down a printer’s fine print. Our bulk pricing keeps things simple. Ten 100% cotton shirts for $99 covers most event, business, or family reunion orders, and we handle the size-scaling checks across a mixed run before production starts, so you’re not left guessing whether your small and your 3XL will match visually.
Beyond shirts, we print custom tumblers, vinyl stickers, and mugs for anyone building out a full merchandise set for an event or storefront. If you’ve got a design ready to go, upload it against the specs in this guide and start your custom t-shirt order today. For anyone still finalizing layout choices, this art print sizing guide offers useful context on visual balance that applies just as well to apparel as it does to wall art.
Sources
- T-Shirt Print Size Guide: How Big Should Your Design Be? — UPrinting
- T-shirt design size guide — Printify
FAQ
What size should a t-shirt design be?
For an adult shirt, a full-front or full-back design should be 12 × 16 inches, while a left-chest logo should be 3.5 to 4 inches wide. Youth sizes typically run 8 to 12 inches for full-front placements.
How do I lay out a t-shirt design?
Center the artwork within the shirt’s printable area rather than the raw fabric width, and place full-front designs 2 to 3 inches below the collar seam. Back designs typically sit 4 to 6 inches below the collar, and left-chest logos sit about 3 to 4 inches in from center.
What size should I use in Canva for a t-shirt design?
Set your Canva canvas to match your final print size in inches at 300 DPI, so a 12 × 16 inch design becomes a 3,600 × 4,800 pixel canvas. Export as a transparent PNG unless your printer requests a vector file.
How far down should a design be on a shirt?
Front designs generally start 2 to 3 inches below the collar, and back designs start lower, around 4 to 6 inches down. Left-chest logos sit roughly 7 to 8 inches below the shoulder seam depending on the shirt’s collar style.
Does Shaysprintshop accept files sized at these standard dimensions?
Yes, Shaysprintshop works from the same 12 × 16 inch full-front and 3.5 to 4 inch left-chest standards covered in this guide. Current pricing and order details are available on the custom t-shirt product page.
0 comments