

Use 300 DPI at actual print size for your t-shirt art. That’s the industry standard, and Shay’s Print Shop follows it on every order we run. If your design is a large, simple graphic going through DTG or DTF, 150 DPI is usually the floor you can get away with. DPI just means pixels divided by inches, so the size you build your canvas at from the start decides everything else.
TL;DR:
- Building your design at the actual print size and aiming for 300 DPI ensures maximum detail and sharpness on apparel, with 150 DPI acceptable only for large, simple graphics.
- Resizing an existing low-resolution file without resampling does not increase detail, so recreating the design at the correct size and DPI from the start prevents quality issues.
- Vector files like AI, EPS, or SVG eliminate the DPI debate by scaling without loss of detail, making them ideal for logos and flat graphics.
- Most print providers consider 150 DPI sufficient for large, flat, bold designs printed with DTG or DTF, but photographic and fine text details require 300 DPI.
- Shay’s Print Shop checks pixel dimensions before production and will flag files below 150 DPI at print size to avoid costly reprints.
Table of Contents
- Choosing Between 300 DPI and Lower Resolutions
- How to Calculate Pixel Dimensions for Your Design
- What File Formats and Color Settings Actually Matter
- When a Lower Resolution Design Still Works
- Fixing Common DPI Mistakes Before You Order
- How Shay’s Print Shop Handles File Prep
- A Quick Preflight Checklist Before You Upload
- The One Rule Worth Remembering
- Get Print-Ready Shirts Without Doing the Math Yourself
- Where These Recommendations Come From
- Sources
- FAQ
Choosing Between 300 DPI and Lower Resolutions
The 300 DPI rule didn’t come out of nowhere. It comes from matching image resolution to the line screen used in traditional halftone printing, and that relationship still holds up for apparel viewed at a normal arm’s length. At that distance, 300 DPI keeps text sharp, gradients smooth, and photo details intact. Anything less and you start losing edges you didn’t know you had.
You can drop to 150 to 200 DPI and still get a usable print, but only under the right conditions:
- The design is bold, flat, and simple, like a single logo or block text.
- The print area is large, so individual pixels get stretched wider and become less noticeable.
- The method is DTG or DTF, since most providers set their minimum threshold in that 150 to 200 DPI range.
Pro Tip: If your file’s effective resolution reads below 150 DPI at print size, most upload validators will flag it before you even get to checkout.
Pushing past 300 DPI rarely buys you anything. Screen mesh, DTG printheads, and DTF film all cap out at the detail level 300 DPI satisfies, so higher DPI files usually only increase export time and file size.
How to Calculate Pixel Dimensions for Your Design
The math is simple: pixels equal inches multiplied by DPI. A file’s DPI label doesn’t add resolution on its own. Changing that number in your software’s image size dialog without resampling just tells the printer to interpret existing pixels differently — it doesn’t create new detail.
Here’s what that math looks like for common placements:
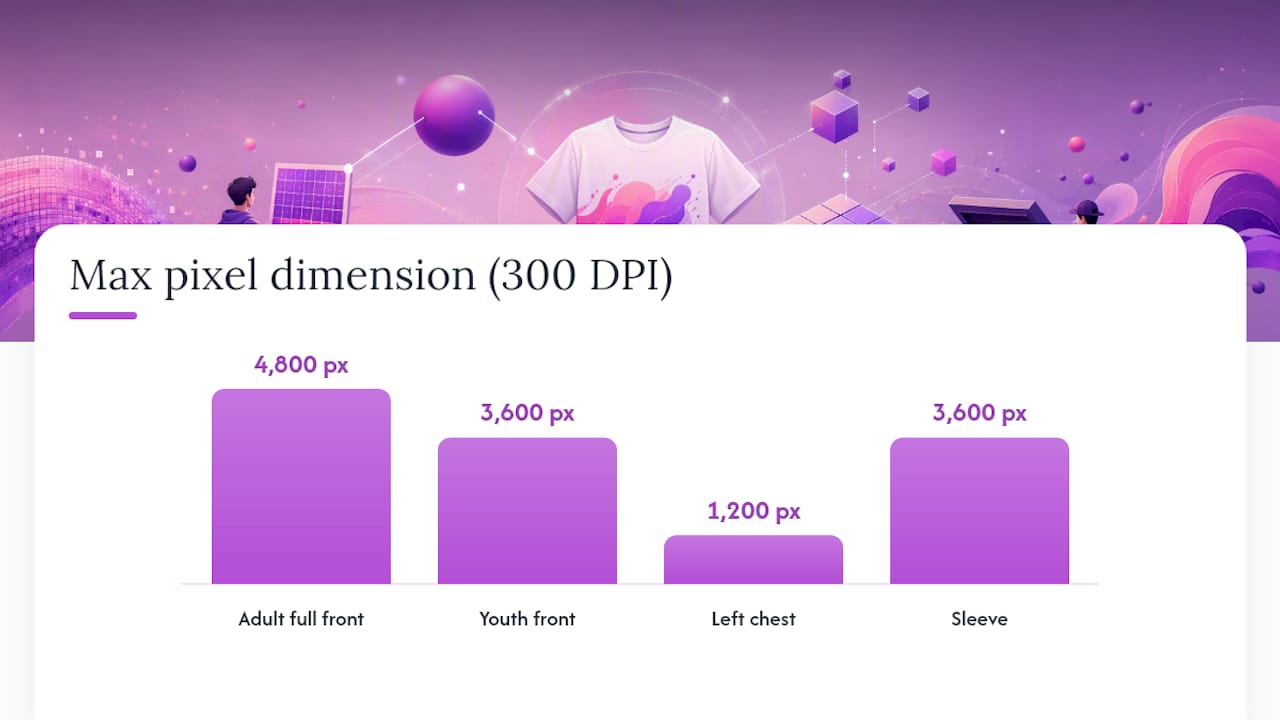
| Placement | Typical size | Pixels at 300 DPI | Pixels at 150 DPI |
|---|---|---|---|
| Adult full front | 12 × 16 in | 3,600 × 4,800 px | 1,800 × 2,400 px |
| Youth front | 10 × 12 in | 3,000 × 3,600 px | 1,500 × 1,800 px |
| Left chest | 4 × 4 in | 1,200 × 1,200 px | 600 × 600 px |
| Sleeve | 3 × 12 in | 900 × 3,600 px | 450 × 1,800 px |
These figures line up with the standard placement specs most print shops build their templates around.
Say you’re prepping a 12 × 16 inch front design. Multiply each dimension by 300, and you land on 3,600 × 4,800 pixels, which is your target canvas from the first click, not something you fix at the end. Once your file is built, zoom to 100% in your editor. If the art looks soft or pixelated at that zoom level, it will look the same way on the shirt.
What File Formats and Color Settings Actually Matter
Raster files (PNG, JPG) work for photographic or gradient-heavy designs. Vector files (AI, EPS, SVG) work for logos, text, and flat graphics, and they sidestep the DPI question entirely since they scale without losing detail. If your design is line art or a simple logo, exporting as a vector removes the resolution debate before it starts.
Here’s the export checklist we use at Shay’s Print Shop for different methods:
- DTG/DTF: transparent background PNG, sized to the exact print area, 300 DPI, sRGB color profile.
- Screen printing: vector file (AI, EPS, or PDF) with all text outlined to paths.
- Vinyl cutting: vector file with clean, closed paths and no stray anchor points.
Pro Tip: Outline your fonts before exporting for screen print or vinyl. A missing font on our end can turn your headline into a block of gibberish.
Leave a small margin of bleed around full-front designs so trimming doesn’t clip your edges, and avoid saving through multiple rounds of JPEG compression, which stacks visible artifacts every time you resave. Our file formats guide breaks down format choices by print method in more detail.
When a Lower Resolution Design Still Works
Lower resolution files aren’t automatically a dealbreaker. A few scenarios tolerate 150 DPI or even less without a visible drop in quality:
- Oversized, single-color graphics printed across most of the shirt front.
- Screen printing through a coarse mesh count, where fine detail wasn’t going to survive anyway.
- Designs meant to read from a distance, like team shirts viewed across a field.
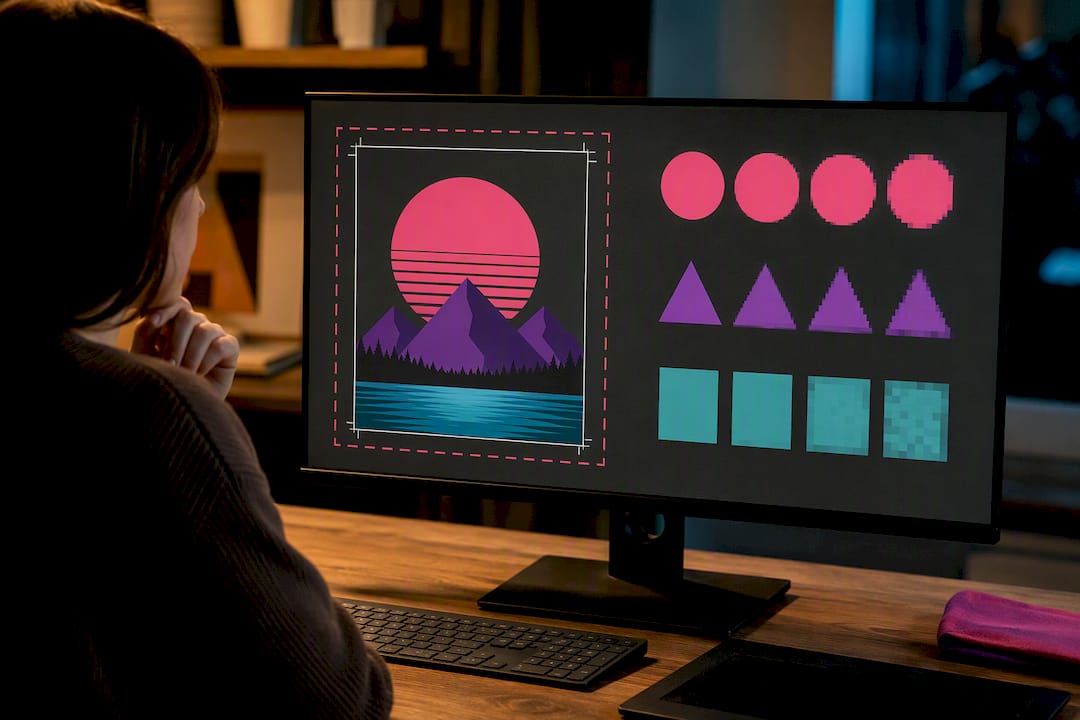
Where it breaks down is fine text and photographic detail. Small type under roughly 12 points tends to blur or fill in below 150 DPI, and photo-based art loses shading and edge definition fast. If you’re stuck with a low-resolution file, three fixes usually save the job: trace the art into a vector, simplify the design into flatter shapes, or switch to a print method that’s more forgiving of soft edges.
Fixing Common DPI Mistakes Before You Order
Most rejected files share the same root problem: someone tried to fix resolution after the fact instead of building at print size from the start. Typing a new number into the DPI field doesn’t add pixels. It just relabels how the existing pixels get printed, and stretching a small image up in Photoshop just makes soft edges bigger, not sharper.
If your file looks rough, run through this repair order:
- Check the source. Ask whoever made the design for the original vector or full-resolution file.
- Rebuild the canvas at the actual print size and 300 DPI, rather than resizing an existing low-res file.
- Trace simple logos or text into vector paths if no original file exists.
- Re-export as a transparent PNG or vector, matching the format your print method needs.
Pro Tip: If you can zoom into your file at 100% and count individual pixels along a curve, that curve will show the same jagged edge on the shirt.
How Shay’s Print Shop Handles File Prep
At Shay’s Print Shop, we check every upload against print-area pixel targets before a job goes into production. When a file comes in under 150 DPI for its intended size, our team flags it and works with the customer on a fix, whether that’s requesting a better source file or suggesting a simpler design that holds up at the requested placement.
We built our process around fast turnaround and bulk orders, so file checks happen early rather than after your shirts are already queued. Jon Will, who oversees quality standards here, puts it plainly: catching a resolution problem before printing saves everyone a reprint.
A Quick Preflight Checklist Before You Upload
Run through this before submitting any file:
- Pixel dimensions match your placement size multiplied by your target DPI.
- Background is transparent (PNG) or the file is vector.
- Color profile is set to sRGB.
- All text is outlined, not left as editable font layers.
- File size fits within your print method’s upload limit.
Pro Tip: In Photoshop, check Image > Image Size with “Resample” unchecked to see your file’s true effective DPI at print dimensions. Canva and Illustrator show similar info in their export or document setup panels.
When you’re still unsure whether a file will hold up, order one sample shirt before committing to a bulk run. It’s the cheapest way to catch a resolution problem.
The One Rule Worth Remembering
If I had to leave designers with a single habit, it’s this: build your canvas at the final print size and resolution before you draw a single shape. Everything else, from pixel counts to file formats, falls out of that one decision. Target 300 DPI, treat 150 DPI as your floor for big simple graphics, and lean on vector art whenever a design allows it. When you’re not sure your file will hold up, ask Shay’s Print Shop to take a look, and order a sample before you commit to a full run.
— Jon Will
Get Print-Ready Shirts Without Doing the Math Yourself
A reliable print shop takes the guesswork out of the DPI conversation by checking your pixel dimensions before your order goes into production, not after. If your file needs a quick fix like a background removal or a resize to the correct print area, some print shops handle that as part of getting your order ready, not as a separate hurdle.
Our Custom T-Shirts, 10 for $99 package covers 100% cotton shirts for reunions, teams, and small businesses, and it’s built for exactly the kind of bulk order where consistent print quality across ten shirts matters. If you’re also outfitting an event with matching promotional pieces, our 3 inch custom stickers run through the same file checks. Upload your artwork and place your order, and the print provider may flag anything that needs adjusting before printing.
Where These Recommendations Come From
The pixel-math and DPI thresholds in this guide draw from WildandFree Tools’ breakdown of 150 versus 300 DPI, The Image Prep’s explainer on what printers actually need, and Kapa99’s placement-by-placement size guide. Our logo upload guidelines walk through the same specs in more detail for logo-specific files.
Sources
- 300 DPI Explained: What Printers Actually Want
- T-Shirt Design Size by Placement (+ DPI & File Specs)
FAQ
Is 300 DPI Better Than 1200 DPI for Print Quality?
For t-shirt printing, no. Screen mesh and DTG/DTF equipment can’t resolve detail beyond what 300 DPI already delivers, so a higher DPI file just adds file size without a visible quality gain.
What Pixel Size Is 8.5 × 11 Inches at 300 DPI?
An 8.5 × 11 inch image at 300 DPI comes out to 2,550 × 3,300 pixels, using the same pixels-equal-inches-times-DPI math that applies to any t-shirt placement.
Is 600 or 1200 DPI Better for Printing?
Neither offers a real advantage for apparel. Both exceed what garment printing methods can reproduce, so 300 DPI remains the practical ceiling worth targeting.
Is 800 or 1200 DPI Better?
For t-shirt art, the difference is irrelevant since both are far beyond what DTG, DTF, or screen printing can resolve. Building your file at 300 DPI and the correct print size gets better real-world results than chasing a higher number.
What’s the Minimum DPI a Print Shop Will Accept?
Most DTG and DTF providers treat 150 DPI as the practical minimum for large, simple designs, though 300 DPI stays the safer target for anything with fine detail or small text.
0 comments