

Every logo upload should include five files: an SVG master, an editable source file (AI or layered PDF with preserved vectors), a print-ready PDF or EPS, transparent PNG exports at your required pixel sizes, and a favicon or social-square PNG. For web uploads, use RGB (sRGB). For print handoffs, use CMYK or a print-ready PDF. Raster exports need sufficient resolution for print, calculated by multiplying your target print size in inches by the appropriate DPI. Most platforms cap uploads at a moderate file size limit.
Your upload-ready checklist:
- SVG master (web-ready, scalable)
- Editable AI or layered PDF (source of truth)
- Print-ready PDF or EPS with fonts outlined
- Transparent PNG at required pixel dimensions (300 DPI for print)
- Favicon (32×32 px) and social-square PNG (1:1 ratio)
- Color mode documented: hex + CMYK + Pantone equivalents
- Filename convention applied:
brandname_variant_colorspace_size.ext
Table of Contents
- What upload guidelines for logos actually require by file format
- How to calculate the right resolution and pixel size for print
- RGB vs CMYK vs Pantone: which color mode to use and when
- How to handle transparency, aspect ratio, and safe area
- How to name files and structure your logo delivery package
- Platform-specific upload rules for Canva, Envato, and Google
- What printers actually want: the Shaysprintshop handoff checklist
- How to fix the most common upload errors
- Are logo files a security risk?
- Version control and keeping your logo consistent across platforms
- Key Takeaways
- The file mistakes that cost real production time
- Shaysprintshop makes your logo work on every shirt
- Useful sources for verifying platform specs and printer requirements
What upload guidelines for logos actually require by file format
Logo file format guidance from Shopify confirms that vector files (AI, EPS, PDF, SVG) are required for apparel, signage, and large-format printing because they scale without quality loss and support color-separation workflows. Raster files (PNG, JPG, WebP) serve web, email, and social media but cannot replace a vector master.
Here is how each format fits into a real logo workflow:
- PDF (print-ready): The preferred print handoff format when vectors are preserved and fonts are outlined. Printers can open it in any RIP without needing Illustrator.
- SVG: The web standard for logos. Scales cleanly, stays editable in code, and is preferred by major platforms including Google CSS Center. Use it as your web master.
| Format | Type | Transparency | Best Use |
|---|---|---|---|
| AI | Vector | Yes | Editable master |
| Vector/hybrid | Yes | Print handoff | |
| EPS | Vector | Yes | Legacy print, Envato |
| SVG | Vector | Yes | Web master |
| PNG | Raster | Yes (alpha) | Platform uploads, web |
| JPG | Raster | No | Photos only |
| WebP | Raster | Yes | Modern web, some platforms |
A complete logo package includes a primary lockup, a horizontal variant, an icon-only mark, a reversed (white) version, and a one-color version. Sending only a single PNG is the single most common reason a print job gets delayed.
How to calculate the right resolution and pixel size for print
The math is straightforward: desired print size in inches × 300 DPI = required pixel width. A logo printed at a few inches wide needs a PNG with a pixel dimension scaled appropriately for clear print output. For small icons or chest prints under 2 inches, 600 pixels per inch gives noticeably crisper results than 300.
Screen resolution (72 or 96 PPI) is not print resolution. A PNG that looks sharp on your monitor at 400 pixels wide will print blurry at 1.3 inches. This is the most common cause of soft or pixelated logos on apparel.
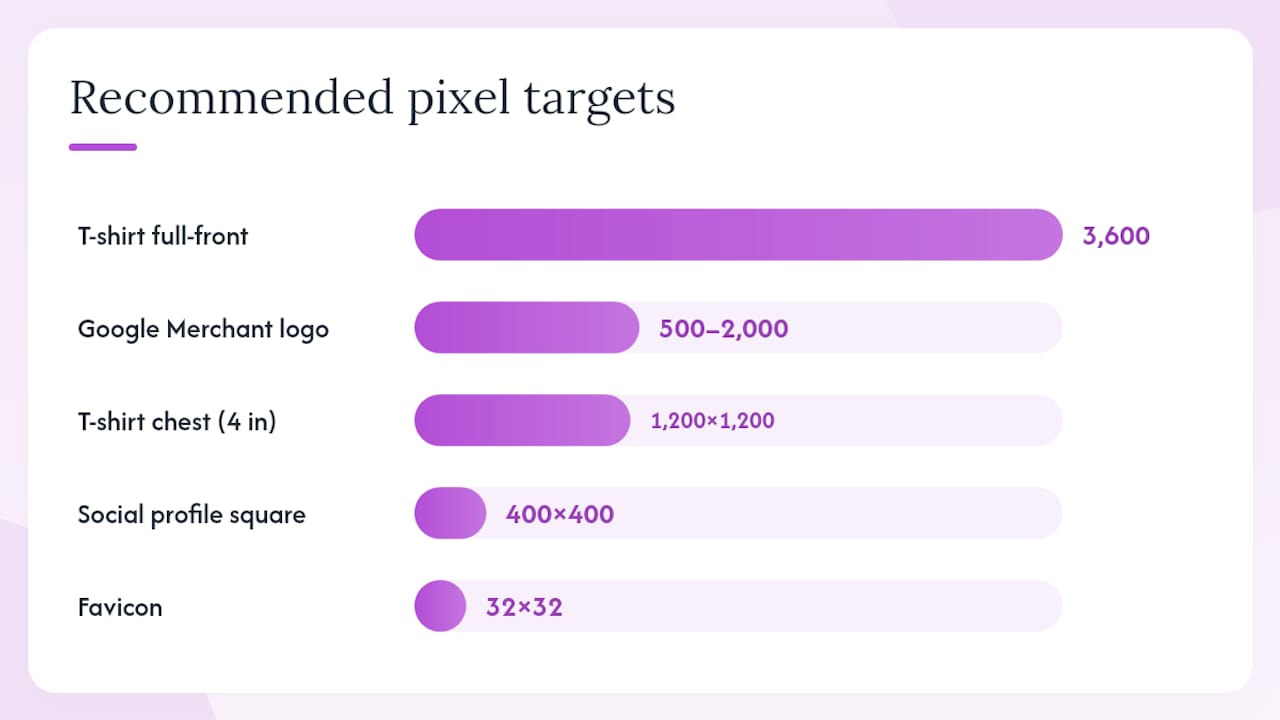
Pixel targets for common print and platform sizes:
| Use Case | Target Size | Min Pixels (300 DPI) |
|---|---|---|
| T-shirt chest logo (4 in) | 4 × 4 in | 1,200 × 1,200 px |
| T-shirt full-front | — | 3,600 px |
| Google Merchant brand logo | 500–2,000 px | 500 × 500 px min |
| Google CSS Center logo | 1:1 square | 32 px minimum |
| Social profile square | 400 px | 400 × 400 px recommended |
| Favicon | 32 × 32 px | 32 × 32 px |
When exporting from a vector master in Adobe Illustrator or Inkscape, set the export resolution to 300 DPI (or 600 for small marks) and export as PNG. Do not rasterize the file inside the application first. Let the export engine handle the conversion so you preserve maximum sharpness.
If your exported PNG exceeds a platform’s file-size limit, reduce dimensions before reducing quality. A 5,000-pixel PNG at 300 DPI is almost always larger than any platform needs. Match the pixel target to the actual display or print size, and the file size usually falls within limits.
RGB vs CMYK vs Pantone: which color mode to use and when
The basic rule: deliver RGB (sRGB) for anything displayed on a screen, and CMYK or a print-ready PDF for press. Pantone or spot colors apply only when the print job explicitly requires them, such as a two-color screen print or a branded item with strict color matching.
RGB and CMYK cover different color ranges. Some vivid blues, greens, and oranges that look bright on screen cannot be reproduced in CMYK ink. If your logo uses a saturated color, do a soft-proof in Illustrator or Photoshop (View > Proof Colors with a CMYK profile) before sending files to print. What you see is close to what the printer will produce.
Color mode quick rules:
- Web, email, social: sRGB
- Offset or digital press: CMYK, embedded ICC profile (ISO Coated v2 or US Web Coated SWOP v2)
- Screen printing, embroidery: Pantone (PMS) reference alongside CMYK
- DTF printing (like Shaysprintshop uses): RGB files are typically preferred; the RIP software handles conversion
Embed the color profile in every exported file. An untagged file forces the printer or platform to guess, and guessing produces color shifts.
Pro Tip: Include a color swatch reference sheet with every logo package: hex value, CMYK breakdown, and the closest Pantone equivalent for each brand color. One page, attached as a PDF. It eliminates the most common back-and-forth between designers and print vendors.
How to handle transparency, aspect ratio, and safe area
Alpha-channel transparency (the “clear” background in a PNG or SVG) is not the same as a white background. A logo saved with a white fill will show a white box when placed on a colored shirt or a dark platform header. Always confirm your PNG has a true transparent background by opening it in a browser or image viewer against a colored background before uploading.
Safe area and clear space matter most at small sizes. A wordmark that reads clearly at 400 pixels wide may become illegible at 32 pixels. For platform avatars and favicons, use an icon-only mark rather than the full wordmark. Most brand guidelines recommend a minimum clear space equal to the cap height of the logo’s tallest letter on all four sides.
Platform aspect-ratio requirements vary, but the most common constraint is a 1:1 square. Google CSS Center and most marketplace profile images require square logos. Do not add white padding to a horizontal logo to force it into a square crop. Instead, prepare a dedicated square variant (icon mark or stacked lockup) and export it at the required pixel dimensions.
Transparency and aspect-ratio checklist:
- Confirm PNG alpha channel: open against a colored background before uploading
- Prepare a square (1:1) variant for platform avatars, separate from the horizontal lockup
- Use an icon-only mark for sizes below 100 pixels
- Never add padding to force an aspect ratio; export the correct crop
- Maintain minimum clear space on all sides to keep the mark legible
For small-format products like custom chocolate or novelty print items, legibility at tiny scales is even more critical. The same principle applies: icon marks outperform wordmarks when the print area is under one inch.
How to name files and structure your logo delivery package
A consistent filename tells anyone who opens the folder exactly what they are looking at without opening the file. Use this structure: brandname_variant_colorspace_size.extension. For example: acme_primary_RGB_1200px.png or acme_icon_CMYK_print.pdf.
Organize deliverables into a clear folder structure with separate subfolders for each file type and color space. A practical structure:
-
/svg— SVG master and variants (primary, icon, reversed, one-color) -
/png— RGB PNGs at required pixel sizes, transparent backgrounds -
/favicon— 32×32 and 16×16 ICO or PNG -
/print— CMYK PDF, EPS, and any Pantone-specified files
Minimum version set for every upload package:
- SVG master (primary lockup)
- AI or layered PDF (editable source)
- Print-ready PDF/EPS (fonts outlined, CMYK)
- PNG transparent exports at required sizes (300 DPI for print, platform sizes for web)
- Social-square PNG (1:1, 400×400 px minimum)
- Favicon (32×32 px)
- Reversed/white version (SVG + PNG)
- One-color version (SVG + PNG)
Deliver the package as a ZIP file with a short README.txt that lists what is included and the color values. A well-organized logo package with named variants and a simple folder structure reduces client questions and printer errors more than any other single practice.
Platform-specific upload rules for Canva, Envato, and Google
Each platform has its own constraints, and knowing them before you export saves a re-upload cycle.
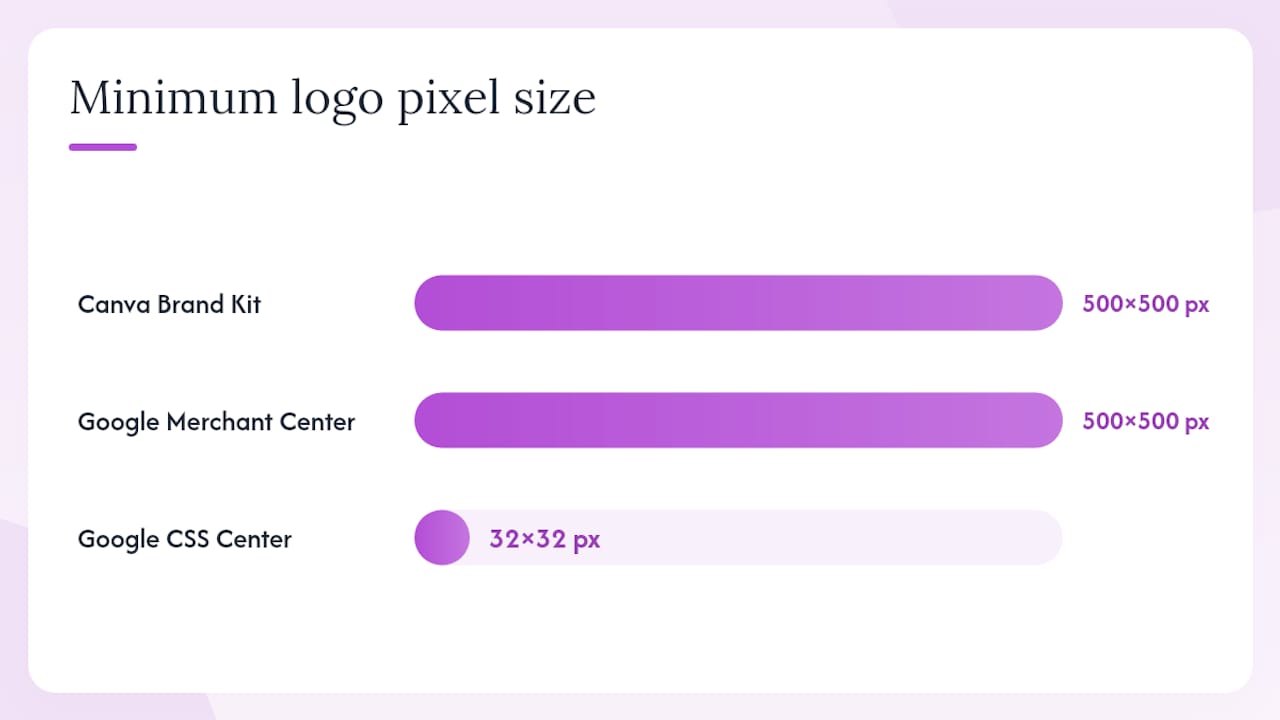
Canva Brand Kit accepts SVG and PNG for logo uploads. SVG is preferred because Canva renders it at any size without quality loss. PNG uploads should be transparent and at least 500×500 px. Canva does not accept AI or EPS files directly. If your logo uses complex gradients or effects, test the SVG render in Canva before delivering it to a client, since some SVG features do not render consistently across all browsers and apps.
Envato (GraphicRiver and logo template marketplaces) requires EPS as the primary vector format for logo template submissions. Files must have editable layers, no embedded raster images, and all fonts outlined or replaced with vector paths. Reviewers reject submissions with missing layers, locked groups, or raster-only elements.
Google CSS Center recommends SVG and accepts PNG or WebP. Square format is required. PNG and WebP must be sized within a small pixel range suitable for icons. The file-size limit is 5MB. Common rejection reasons include illegible text at small scale, added white padding, and watermarked images.
Google Merchant Center requires logos between 500×500 and 2,000×2,000 pixels. Logos go through a review period and can be marked Pending, Approved, or Not Approved. Rejection reasons include illegible text, incorrect branding, and images that do not represent the brand accurately.
| Platform | Accepted Formats | Aspect Ratio | Max File Size | Min Pixel Size |
|---|---|---|---|---|
| Canva Brand Kit | SVG, PNG | Flexible | Not publicly listed | 500×500 px recommended |
| Envato/GraphicRiver | EPS (primary) | Flexible | Not publicly listed | Vector (no min) |
| Google CSS Center | SVG, PNG, WebP | 1:1 square | 5MB | 32×32 px |
| Google Merchant Center | PNG, SVG | 1:1 square | Not publicly listed | 500×500 px |
What printers actually want: the Shaysprintshop handoff checklist
Printers work from a different set of requirements than platforms do. A file that uploads fine to Canva may still cause production problems if it arrives at a print shop without the right specs.
Printer handoff checklist:
- Vector PDF or EPS with all fonts outlined (no live text)
- CMYK color mode, or Pantone specs listed for spot-color jobs
- Embedded images at 300 DPI minimum
- Bleed and trim marks set if the job requires them (typically 0.125 in bleed)
- Layers organized and labeled (background, logo, text)
- File named with job number, color spec, and version (e.g.,
acme_frontprint_CMYK_v2.pdf)
For DTF printing, which Shaysprintshop uses for custom apparel, RGB files with transparent backgrounds are the standard input. The shop’s RIP software handles the color conversion. Pre-converting to CMYK before sending to a DTF printer can actually introduce color shifts, so confirm with the shop before converting.
Native AI files are useful when the printer needs to adjust placement or scale. Flattened PDFs are preferred for final production runs because they eliminate font and layer dependencies. When in doubt, send both: the native AI for flexibility and the flattened PDF as the approved production file.
Pro Tip: When submitting to Shaysprintshop or any print vendor, always confirm the proof before the run starts. Check color, size, placement, and text legibility on the print proof before approving. A five-minute proof review prevents a reprint.
How to fix the most common upload errors
When an upload fails or a logo looks wrong after printing, work through these steps in order.
- SVG renders incorrectly on platform: — Open the SVG in a browser to check rendering. Simplify complex gradients, remove unsupported filters, and re-export. Use a PNG fallback if the platform’s SVG renderer is inconsistent.
To inspect a file locally before uploading: open the SVG in a text editor and check that the viewBox attribute is present. Open the PDF in Adobe Acrobat and use the Output Preview panel to confirm vectors and color mode. Check PNG pixel dimensions and DPI in Photoshop under Image > Image Size.
Are logo files a security risk?
SVG files can embed JavaScript, which means a malicious SVG could execute code when opened in a browser or an SVG-capable application. This is a real risk when accepting logo files from unknown sources.
Safe practices for handling incoming logo files:
- Accept files only from verified clients or trusted sources
- Open SVGs in a text editor first to scan for
<script>tags before opening in a browser - Use a sandboxed environment or a dedicated design application (not a browser) to preview unfamiliar SVGs
- Scan AI and EPS files with antivirus software before opening, since these formats can embed macros
- Never open a ZIP from an unknown sender that claims to contain logo files without scanning it first
For your own outgoing files, keep source AI files on a version-controlled system (Adobe Creative Cloud, GitHub with Git LFS, or a shared drive with version history). Do not distribute editable AI files to clients unless they specifically need them for in-house editing.
Version control and keeping your logo consistent across platforms
Logo inconsistency across platforms is almost always a version-control problem, not a design problem. When multiple people download and re-upload logo files without a single source of truth, old versions spread.
Best practices for logo version control:
- Keep one canonical master folder (cloud storage with version history: Google Drive, Dropbox, or Adobe Creative Cloud Libraries)
- Name files with a version number:
acme_primary_RGB_v3.svg - Archive old versions in a clearly labeled
/archivesubfolder rather than deleting them - When you update a logo, push the new files to every platform where the logo appears and document the update date
- Use Adobe Creative Cloud Libraries or a brand asset management tool (Brandfolder, Bynder) to distribute approved files to teams
- Notify all stakeholders (social media managers, web developers, print vendors) when a logo version changes
Updating a logo on one platform and forgetting three others is how brand inconsistency happens. A simple update log (a shared spreadsheet listing platform, last updated date, and file version) takes five minutes to maintain and prevents months of mixed branding.
Key Takeaways
The single most important rule: always keep an SVG master and a print-ready PDF, and never distribute a low-resolution JPG as a logo file.
| Point | Details |
|---|---|
| SVG is your web master | Use SVG for all platform uploads; keep PNG fallbacks at required pixel sizes for platforms that reject SVG. |
| 300 DPI is the print floor | Multiply target print inches by 300 to get the minimum pixel count for any raster export. |
| Color mode must match the output | Use RGB (sRGB) for web and DTF; use CMYK with an embedded ICC profile for offset and press. |
| Platform specs vary significantly | Google CSS Center limits logo uploads to a few megabytes and small square pixel dimensions; Google Merchant Center requires larger square pixel logos. |
| Shaysprintshop prefers RGB for DTF | Submit transparent RGB PNGs or SVGs; the shop’s RIP handles color conversion, so pre-converting to CMYK can cause shifts. |
The file mistakes that cost real production time
Most upload problems come down to three habits: sending a JPG as the master file, skipping the transparent background, and never building a square icon variant. These are not beginner mistakes. They show up from experienced designers who are moving fast and assume the printer or platform will figure it out.
Platforms do not figure it out. They reject the file or render it incorrectly, and the designer gets a support ticket two days later. Printers do not figure it out either. They either delay the job to request a corrected file or they print from what they have, and the result does not match the brand.
The fix is not complicated. Build the full package once, name it correctly, and store it in a version-controlled folder. Every future upload pulls from that folder. The five-file checklist at the top of this guide covers every scenario: web, print, platform avatar, and favicon. If you send those five files with every handoff, you will almost never get a correction request back.
One more thing worth saying plainly: letting the printer handle CMYK conversion is usually the right call for DTF and digital print. Pre-converting introduces a second conversion step that can dull colors. Send RGB, confirm the proof, and trust the shop’s RIP. That is the workflow that produces the most accurate color on fabric.
Shaysprintshop makes your logo work on every shirt
You have done the hard work of preparing your files. Now you want them on shirts that actually look the way your brand is supposed to look. Shaysprintshop prints custom apparel on 100% cotton with DTF, which means your logo’s colors stay vivid wash after wash. Upload your transparent PNG or SVG, and the team checks your file before the run starts.
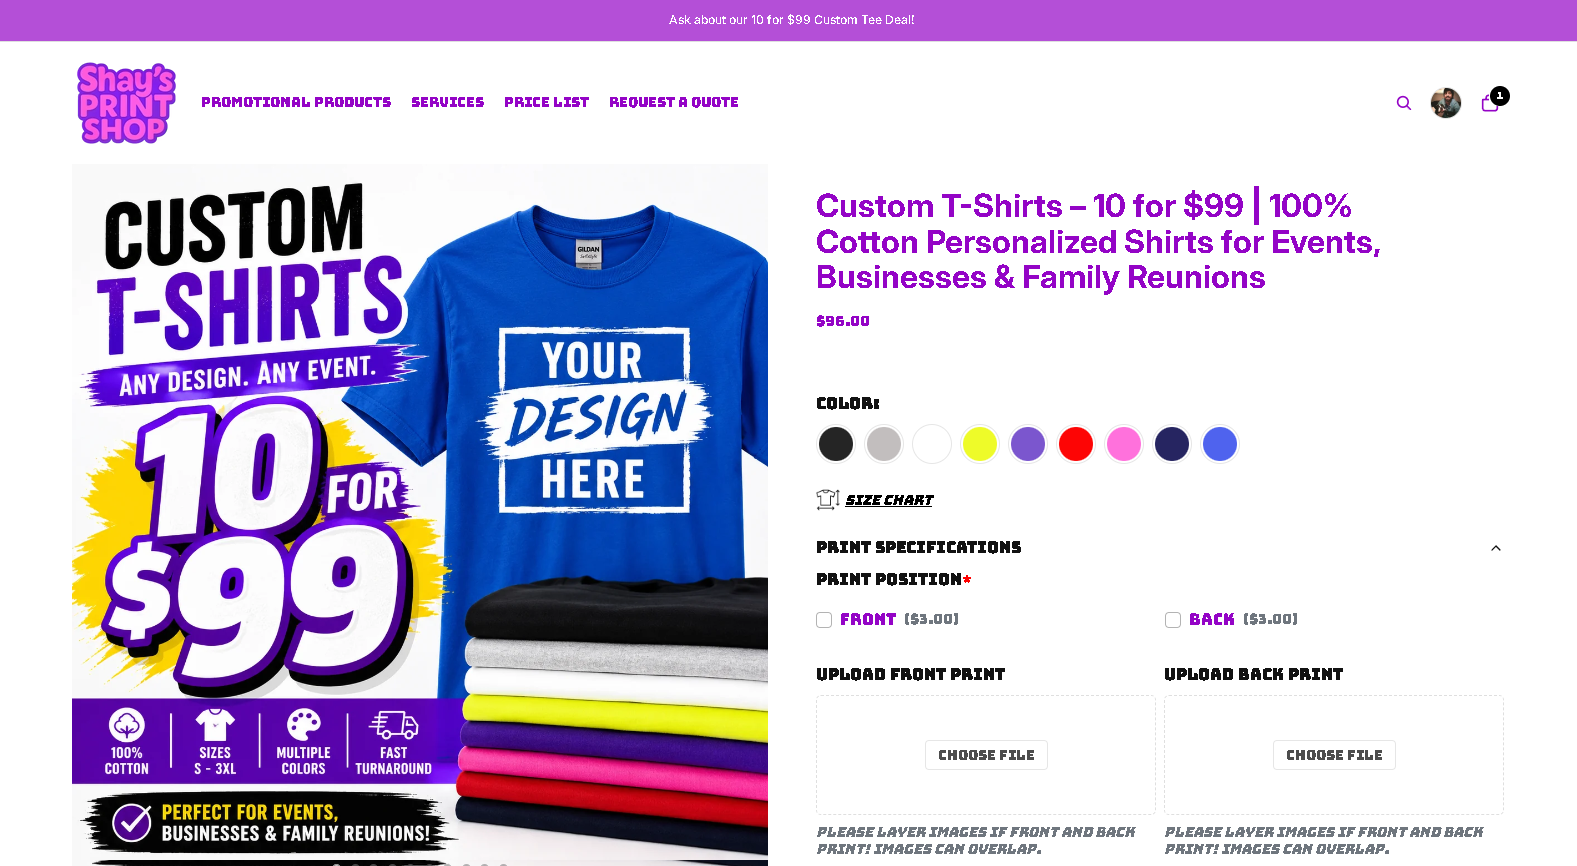
Bulk orders start at 10 shirts for $99, which makes it practical for events, teams, and small businesses to get professional-quality branded apparel without a large minimum. If your file needs a quick conversion or a size adjustment, the shop handles that before printing so your order does not get delayed. Get your bulk shirt order started today and upload your logo at checkout.
Useful sources for verifying platform specs and printer requirements
These are the primary references to check when you need to confirm exact specs before export:
- Logo file format
- Upload a logo to CSS Center
- Upload and use brand logos - Google Merchant Center
- Print file formats explained: PDF vs PNG vs JPG vs SVG vs AI
- Logo File Formats: SVG, PNG, EPS, PDF, and What to Put in a Logo Package - SVG Genie Blog
- How To Create And Deliver Logo Files in 2026
- SVG to PNG for Print: The Resolution Settings I Learned After a $2,300 Brochure Disaster - DEV Community
- SVG vs PNG: When to Use Each Format (Practical Guide 2026) | SVGVector Blog
0 comments