

The standard invitation size is 5" × 7" (A7), and it’s the right default for most weddings, birthday parties, and formal events. PrintPlace confirms that A7 balances design space with mailing practicality, pairing neatly with a 5.25" × 7.25" envelope at standard letter postage. If you’re not sure what size to order, start here.
Common alternatives worth knowing:
- 4" × 6" — photo invites, save-the-dates, casual parties
- 4.25" × 5.5" (A2) — RSVP cards, small note-style invites
- 5.5" × 8.5" — modern layouts, corporate events with lots of copy
- 6" × 6" square — bold, design-forward invites (see postage note below)
- 6" × 9" — panoramic or destination-wedding formats
One mailing note before you order: square and oversized formats often trigger USPS non-machinable surcharges or require hand-canceling. Check your final size and weight with your local post office before you print a full run.
Key Takeaways
The 5" × 7" (A7) format is the default invitation size for a reason: it fits standard envelopes, mails at regular letter rates, and gives you enough design space for clean, readable typography.
| Point | Details |
|---|---|
| Default size is 5" × 7" | A7 pairs with a 5.25" × 7.25" envelope and mails at standard first-class rates. |
| Square shapes cost more to mail | Square envelopes are always non-machinable; budget for a USPS surcharge on every piece. |
| Print files need 0.125" bleed | Extend background colors and patterns 0.125" past the trim line on all four sides. |
| Use 300 DPI and CMYK for print | RGB files converted at the printer often shift colors; submit CMYK from the start. |
| Shaysprintshop handles bulk invite orders | Cards & Invitations service covers proofing, multiple formats, and volume pricing. |
Table of Contents
- What are the standard invitation sizes you can order?
- How do envelope size and USPS rules affect your postage?
- Flat vs. folded invitations: which format fits your event?
- What print file specs does your designer need to submit?
- What pixel dimensions work best for digital invitations?
- How do you choose the right invitation size for your event?
- Are custom sizes and shapes worth the extra cost?
- Shay’s Print Shop ordering checklist for invitation jobs
- Sending invitations outside the United States
- Shaysprintshop prints your invitations, start to finish
- Sources
What are the standard invitation sizes you can order?
UPrinting’s invitation dimensions guide and Template together cover the most common flat and folded formats used in U.S. print shops. Here’s a practical reference:
Folded formats print on a larger sheet and score down the center. A 10" × 7" sheet folds to the familiar 5" × 7" footprint, giving you four printable panels for ceremony details, maps, or a personal note without adding a separate insert card.
Envelope matches to keep handy:
- A7 invite (5" × 7") → 5.25" × 7.25" A7 envelope
- A6 invite (4.5" × 6.25") → 4.75" × 6.5" A6 envelope
- A2 RSVP (4.25" × 5.5") → 4.375" × 5.75" A2 envelope
- 4" × 6" photo invite → 4.25" × 6.25" envelope
A quick example: a photo-led save-the-date at 4" × 6" slides into a standard photo envelope and mails at regular letter rates. Upgrade to a formal 5" × 7" for the actual wedding invite, and you get noticeably more room for typographic hierarchy, venue details, and a crest or monogram.
How do envelope size and USPS rules affect your postage?
Choosing the wrong size or shape can add real cost to every envelope you mail. USPS classifies a piece as non-machinable when it falls outside standard letter dimensions or physical properties, which means hand-processing and a surcharge on top of regular first-class postage.
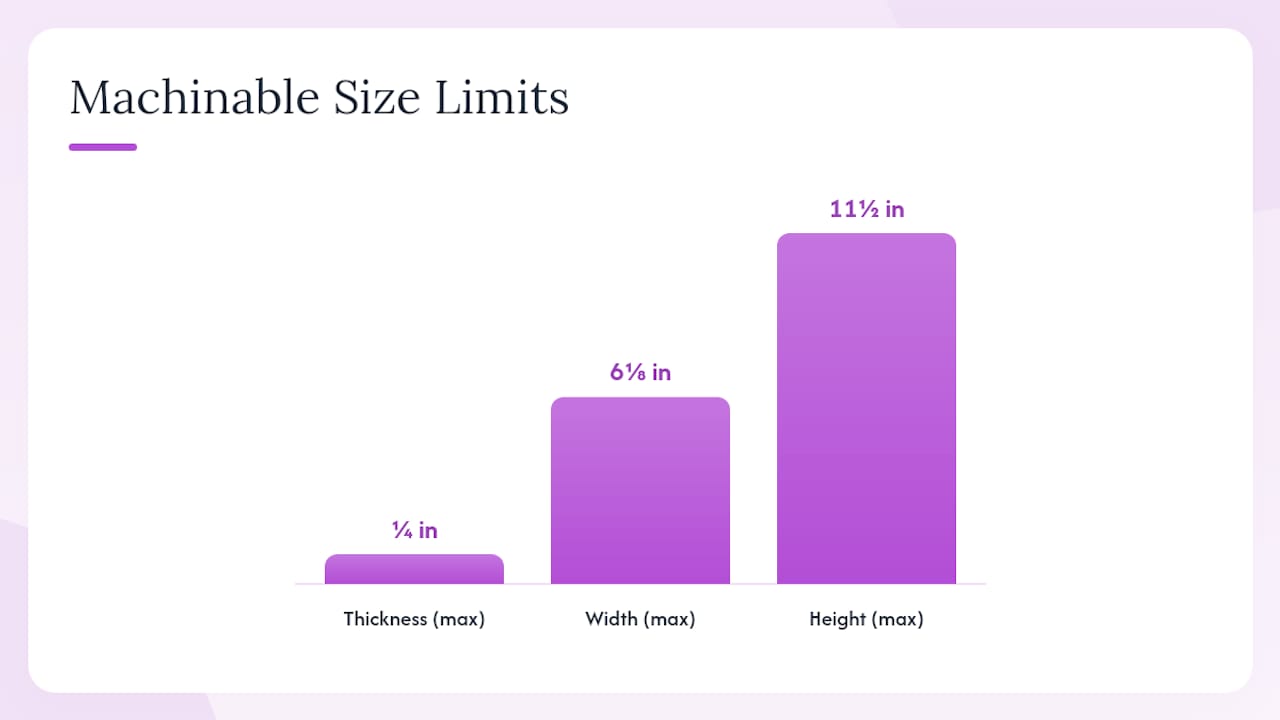
Magnific’s invitation size guide notes that square and irregular shapes frequently increase mailing complexity because they cannot run through automated sorting equipment.
Common non-machinable triggers:
- Square envelopes (any size, including 6" × 6")
- Envelopes thicker than ¼ inch (common when you stuff multiple inserts)
- Rigid contents (acrylic, wood, or thick chipboard invites)
- Envelopes wider than 6⅛ inches or taller than 11½ inches
- Aspect ratio outside the USPS 1.3–2.5 range (length ÷ height)
Using standard A7 or A6 envelopes keeps you inside machinable limits as long as your total weight stays at or below one ounce and your paper stock isn’t unusually stiff.
Before you mail, work through this checklist:
- Weigh a fully stuffed, sealed sample envelope on a postal scale.
- Measure the total thickness with all inserts inside.
- Confirm the aspect ratio (length ÷ height) falls between 1.3 and 2.5.
- Check whether your envelope is square — if yes, budget for the surcharge.
- Ask your printer for the paper weight (gsm or lb text) so you can estimate per-piece weight accurately.
- Take one stuffed, sealed sample to your local post office for a hand-check before ordering stamps in bulk.
A 5" × 7" invite on standard 80 lb text stock with a single RSVP card typically lands under one ounce. Switch to 130 lb cover stock and add a map card plus a return envelope, and you’re likely looking at two ounces — which doubles your postage per piece.
Flat vs. folded invitations: which format fits your event?
The choice between flat and folded comes down to how much content you need to fit and how much you want to spend on printing.
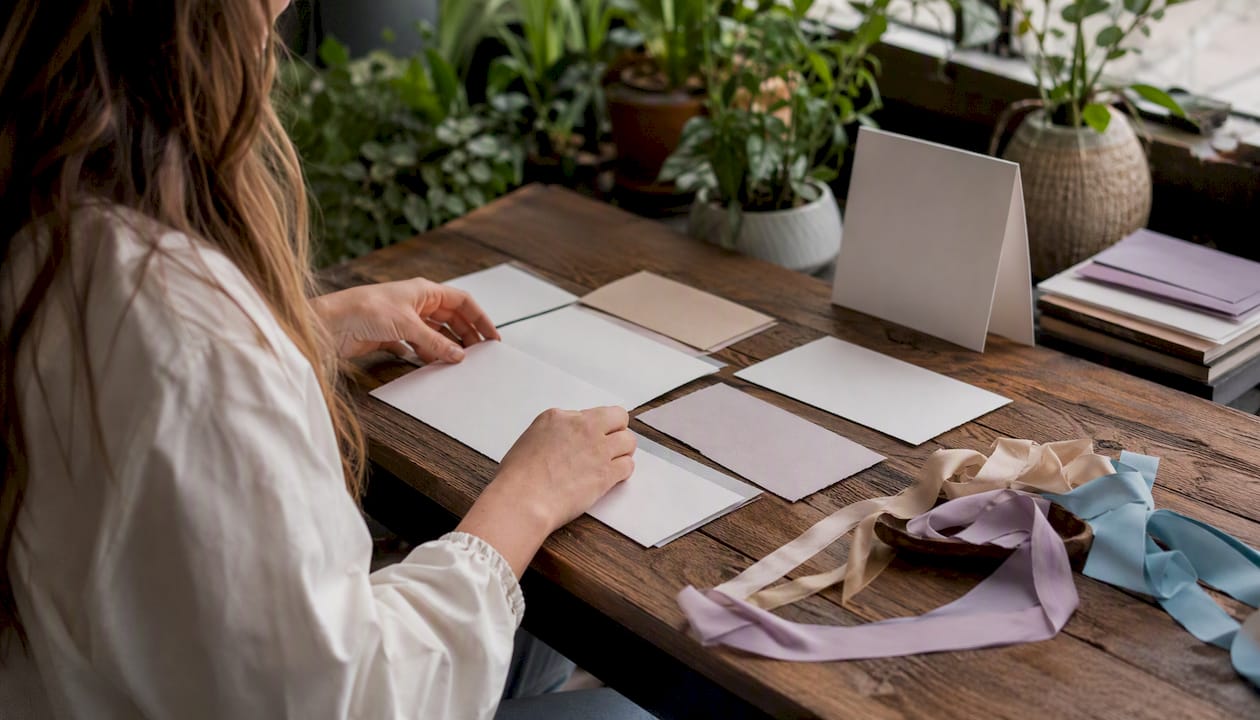
Flat invitations are single-panel cards. They’re simpler to design, faster to print, and easier to stuff into envelopes. Most wedding stationery suites use a flat 5" × 7" main invite paired with separate RSVP and detail cards. The tradeoff is that every piece of information needs its own card, which can mean more inserts and a heavier envelope.
Folded invitations give you two to four panels on one sheet. A 10" × 7" sheet folds to 5" × 7" and prints on both sides, so you can include ceremony details, a map, and a personal note without a separate enclosure. UPrinting’s guide lists the 7" × 5" folded format (folding to 3.5" × 5") as a popular casual option for showers and birthday parties.
RSVP and insert card sizing:
- Standard RSVP card: 4.25" × 5.5" (A2), fits an A2 return envelope
- Small enclosure/detail card: 3.5" × 5"
- Map or directions card: match to the smallest insert already in the suite
A typical wedding envelope stuffed with a 5" × 7" invite, an A2 RSVP card with its return envelope, and a 3.5" × 5" detail card sits right at the edge of the one-ounce limit. Adding a fourth insert almost always pushes you into two-ounce territory.
All-in-one and tri-fold formats are worth considering for casual events or corporate invites where budget matters. They fold flat, mail as a single piece, and eliminate the need for a separate envelope entirely — though they usually require a wafer seal or tab to stay closed for mailing, and USPS has specific rules about self-mailers that are worth confirming before print.
What print file specs does your designer need to submit?
Get these specs right before you send files to any printer, and you’ll avoid reproof rounds and color surprises.
The short version: 300 DPI, CMYK color mode, 0.125" bleed on all four sides, keep all text and critical design elements at least 0.25" inside the trim line, and export as PDF/X-1a or a high-resolution print-ready PDF. Template.net’s size guide and Gold Image Printing’s invitation specs both align on these as the baseline for clean print output.
Full spec checklist for your designer:
- Resolution: 300 DPI minimum at final print size (never scale up a 72 DPI screen image)
- Color mode: CMYK, not RGB — RGB files converted at the printer often shift colors noticeably
- Bleed: 0.125" (⅛ inch) on all four sides beyond the trim line
- Safe area: keep all text and logos at least 0.25" inside the trim line
- Crop marks: include them; they tell the cutter exactly where to trim
- Fonts: embed all fonts or convert to outlines before export
- Transparency: flatten all transparent layers before saving the final PDF
- File format: PDF/X-1a preferred; high-res PDF with bleeds and marks accepted by most shops
Pro Tip: Your monitor displays in RGB, and even a calibrated screen won’t show you exactly what CMYK ink looks like on paper. Ask your printer for a color profile or request a hard proof on your chosen stock before approving a full run — especially for deep navy, burgundy, or blush tones that shift significantly between screen and press.
What pixel dimensions work best for digital invitations?
Digital invitations need different specs than print files. The goal is legibility on a phone screen and clean rendering in an email preview, not press-ready resolution.
Start here for the most common use cases:
- Square social post (Instagram feed): 1080 × 1080 px (1:1)
- Vertical story/reel (Instagram, Facebook, TikTok): 1080 × 1920 px (9:16)
- Link preview (Facebook, LinkedIn, email header): 1200 × 630 px (1.91:1)
- Pinterest pin: 1000 × 1500 px (2:3)
- Email body image: 600 px wide maximum, height flexible
Canva’s invitation size guide provides ready-made templates for these dimensions, which is a fast starting point if you’re designing digitally before moving to print.
Export tips for digital files:
- Use RGB (specifically sRGB) for anything displayed on a screen
- Export JPEG at 80–90% quality for email — large files get clipped or blocked by spam filters
- PNG works better when your design has a transparent background or fine text on a light field
- Always keep a separate print-ready PDF (CMYK, 300 DPI, with bleed) if you plan to mail physical copies later
Exporting a compressed RGB JPEG for email and a separate CMYK PDF for print avoids the color and layout surprises that come from sharing one file across both channels.
How do you choose the right invitation size for your event?
When in doubt, choose 5" × 7". It’s the most widely stocked size at print shops, fits standard A7 envelopes, and gives you enough room for clean typography without pushing into oversized postage territory. Move up or down from there based on the factors below.
Step-by-step decision checklist:
- List everything that needs to fit on the invite — names, date, time, venue, dress code, RSVP instructions, website URL. More content means you need more space or a folded format.
- Set your tone. A 3.5" × 5" feels casual and personal. A 5.5" × 8.5" reads modern and editorial. A 5" × 7" is formal without being stiff.
- Check envelope availability. Standard A7 and A6 envelopes are easy to source at any office supply store. Unusual sizes may require a specialty order that adds lead time and cost.
- Estimate your postage. Weigh a stuffed sample before you commit to a size. Square envelopes and heavy stocks add up fast across 150 or 200 invites.
- Get a print quote at your chosen size before finalizing the design. Larger formats and heavier stocks cost more per unit, and the difference between 5" × 7" and 5.5" × 8.5" can be meaningful at quantities above 100.
- Request a proof. Always approve a printed sample before the full run.
Accessibility matters too. A minimum 12-point font on a 5" × 7" card is readable for most guests. If your list includes older guests or guests with low vision, lean toward larger sizes and high-contrast color combinations. Avoid light gray text on white or script fonts below 14 points.
A real example: You’re planning a wedding and need to include a main invite, a map card, and an RSVP card with a return envelope. A 5" × 7" flat invite handles the main event details. A 3.5" × 5" map card and a 4.25" × 5.5" RSVP card with its A2 return envelope all fit in a standard A7 outer envelope. Weigh the fully stuffed envelope — if it’s over one ounce, consider moving the map to the back of the invite or switching to a folded format to reduce insert count.
Are custom sizes and shapes worth the extra cost?
Custom shapes add visual impact, but they almost always cost more to print and mail. The answer depends on your budget and how much the format itself matters to your event’s aesthetic.
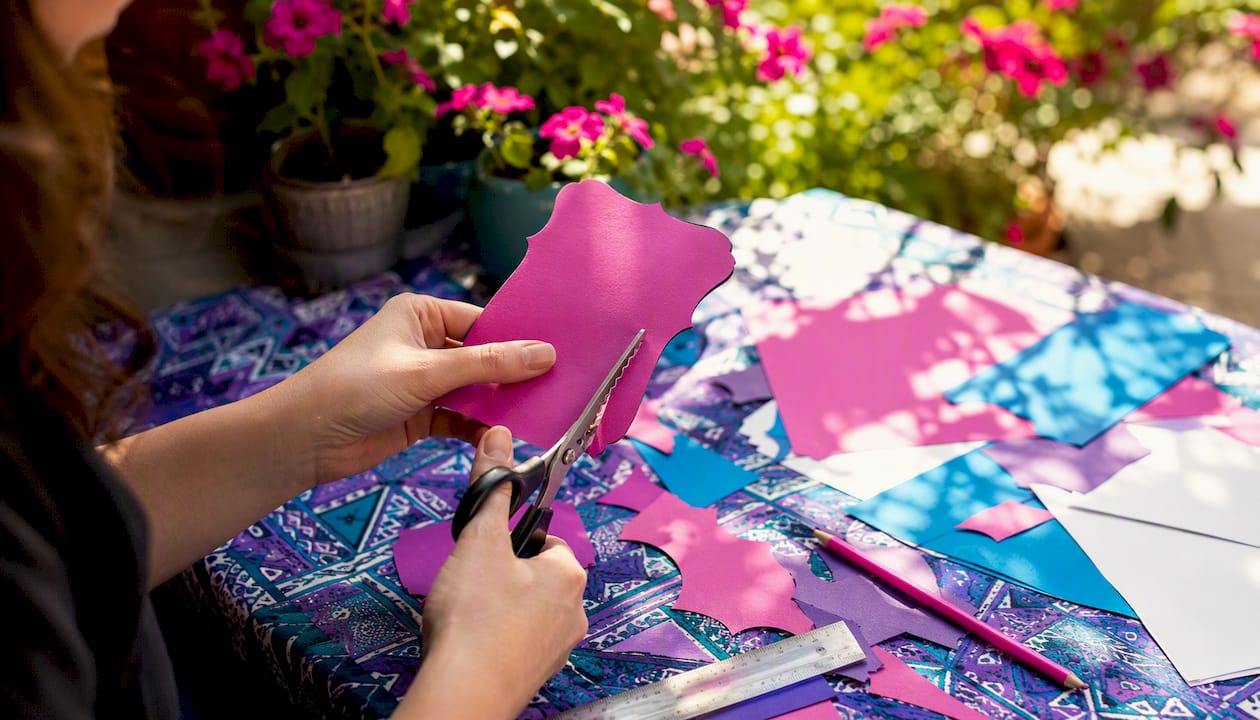
Magnific’s guide is clear that squares and irregular shapes frequently trigger non-machinable surcharges or require custom envelopes that aren’t available off the shelf.
What to know about custom formats:
- Die-cut shapes (circles, arches, custom silhouettes) require a custom cutting die, which adds a setup fee. Most print shops have minimum order quantities for die-cut jobs, often 50–100 pieces.
- Square invites (6" × 6" is the most popular) are visually striking but require square envelopes, which USPS always classifies as non-machinable. Budget for the surcharge on every piece.
- Long/skinny formats (like 4" × 9") can look elegant but may fall outside standard envelope sizes, forcing a custom envelope order.
- Thick or rigid materials (acrylic, wood veneer, thick chipboard) are non-machinable regardless of size and typically require hand-delivery or a padded mailer.
Pros and cons at a glance:
- Pros: strong visual differentiation, memorable unboxing experience, on-trend for luxury and destination events
- Cons: higher per-unit print cost, custom envelope sourcing, non-machinable postage surcharges, longer production lead time
Practical advice: Before committing to a custom shape, ask your printer for a mailability test and request a physical mock-up. Confirm the envelope source and get a postage estimate from USPS before you approve the design. A shape that looks perfect on screen can create real logistical headaches at the post office.
Shay’s Print Shop ordering checklist for invitation jobs
Getting your file specs right before you upload saves time on both sides. Here’s what Shaysprintshop needs to produce your invitation order cleanly and on schedule.
Required specs to confirm before submitting:
- Final trimmed size (e.g., 5" × 7")
- Bleed: 0.125" on all four sides
- Resolution: 300 DPI at final print size
- Color mode: CMYK
- Paper stock: weight and finish (e.g., 100 lb text, matte; or 130 lb cover, soft-touch)
- Quantity
- Turnaround needed (standard vs. expedited)
- Mailing or shipping instructions
Sample spec line you can paste into your order notes: 5" × 7" trimmed, 0.125" bleed, 300 DPI, CMYK, 100 lb text, matte finish, qty 100, standard turnaround.
Always approve a digital or hard proof before the full run goes to press. For unusual sizes or heavy stocks, a physical proof is worth the extra day — it confirms color, trim accuracy, and how the piece feels in hand.
Common upload mistakes to avoid:
- Submitting RGB files instead of CMYK
- Fonts not embedded or converted to outlines
- Missing bleed (design stops at the trim line with no bleed extension)
- Low-resolution images placed at print size (anything below 300 DPI will look soft or pixelated)
- Transparency layers not flattened before PDF export
Pro Tip: If your design uses a background color or pattern that extends to the edge, extend it 0.125" past the trim line on every side. Without bleed, even a small shift during cutting leaves a white border that makes the finished piece look unfinished.
Sending invitations outside the United States
If your guest list includes international addresses, postage and size rules change significantly. USPS international mail rates are calculated by destination country, weight, and service level — not by the same machinable/non-machinable framework used for domestic letters.
A standard 5" × 7" invite mailed internationally via USPS First-Class Package International or Priority Mail International will cost considerably more per piece than domestic first-class. Rates vary by country and weight, so check the USPS Price Calculator with a fully stuffed, weighed sample before ordering postage.
A few practical notes for international mailings:
- Customs forms are not required for paper invitations mailed as correspondence, but confirm this with your post office for the specific destination country.
- Delivery times vary widely. Allow four to six weeks for destinations in Europe or Asia when using standard international mail, and longer for more remote locations.
- Return addresses on international mail should include your full country name (United States) to help foreign postal services route any undeliverable pieces back correctly.
- Square or oversized formats face the same non-machinable complications internationally, and some countries’ postal systems have stricter size limits than USPS. Stick to standard rectangular formats for international sends whenever possible.
If you’re mailing to Canada specifically, Canada Post size and weight limits are close to USPS domestic letter standards, but postage is calculated separately and must be purchased as international postage from USPS, not domestic stamps.
Why size choices matter more than most people realize
There’s a moment in every invitation order where the size decision stops feeling aesthetic and starts feeling financial. A couple chooses a 6" × 6" square invite because it looks stunning on Pinterest. Then they stuff 175 envelopes, take them to the post office, and find out every single one needs a non-machinable surcharge. That’s a real cost that wasn’t in the budget.
From a production standpoint, standard sizes exist because they fit the equipment. A 5" × 7" card runs on the same press sheet as dozens of other jobs, which keeps setup costs low and turnaround fast. A custom die-cut or an unusual dimension often means a dedicated press setup, a longer queue, and a higher unit cost — even for a modest quantity.
The clients who get the best results are the ones who decide on size early, before the design is finished. Designing around a size is much easier than redesigning because the size changed. And the ones who request a proof — every time, without exception — almost never have a reprint conversation.
Shaysprintshop prints your invitations, start to finish
You’ve got the size picked, the file specs ready, and a guest list waiting. Shaysprintshop handles the rest — from proofing to the finished stack of cards ready to stuff and mail.
Shaysprintshop’s Cards & Invitations service covers flat and folded formats, bulk quantities, and fast turnaround for events of any size. Whether you need 25 birthday invites or 300 wedding suites, the shop can handle proofs, paper stock selection, and bulk print runs without the agency markup.
- Proofing: digital proofs included; hard proofs available on request
- Bulk pricing: volume discounts apply as quantity increases
- Formats: flat cards, folded invites, RSVP cards, and enclosure cards
- Turnaround: standard and expedited options available
- File support: the team can flag spec issues before your job goes to press
To get started, upload your print-ready file (CMYK PDF, 300 DPI, 0.125" bleed) through the Cards & Invitations page and include your spec notes in the order comments. If your file isn’t quite print-ready yet, reach out before uploading and the team can point you in the right direction.
Sources
The sources below were used to compile this guide and are worth bookmarking for spec checks and template downloads:
- The Standard Invitation Size Guide: Formats, Uses, and Other Tips | PrintPlace
- Invitation Sizes and Dimensions Guide | UPrinting
- Invitation Size - Dimension, Inches, mm, cms, Pixel
- Invitation Size Complete Guide 2026 | Magnific Blog
- Invitation Sizes Chart
Recommended
- Print Proof Approval: Your Complete Guide for Events and Businesses – Shay’s Print Shop
- Custom Vinyl Sticker Size Guide: Pick the Right Fit – Shay’s Print Shop
- DTG vs DTF for Apparel: Which Method Should You Choose? – Shay’s Print Shop
- Bulk T-Shirt Ordering for Events, Teams & Businesses – Shay’s Print Shop
0 comments