

Order bulk pre-printed shirts when you have more than two weeks and want the lowest cost per piece. Choose rush bulk when your event lands in 3 to 10 days and you’re willing to pay a premium to hit that date. Book on-site live printing when guest personalization and show-floor buzz matter more than unit price. Shaysprintshop’s 10-for-$99 bulk package covers the first two, and a custom tumbler works well as a lower-cost add-on gift.
TL;DR:
- Bulk pre-ordering is best for events with more than two weeks’ lead time and a confirmed headcount to maximize cost savings and predictability.
- Rush bulk is suitable for last-minute scenarios within three to ten days, but it incurs higher costs and less flexibility.
- On-site live printing creates a memorable experience but requires space, power, staffing, and proper setup to manage throughput effectively.
- Accurate art files, size forms, and clear distribution plans are critical to avoid delays, reprints, or chaos during shirt pickup.
- Per-shirt costs decrease significantly with order volume, ranging from about $12 to $18 for small runs up to $5 to $9 for large bulk orders, depending on method and extras.
Table of Contents
- How Do You Choose Between Bulk Pre-Order, Rush Bulk, and On-Site Printing?
- How Many Shirts Should You Order and How Do You Budget for Them?
- Which Printing Method Should You Use for Event Shirts?
- What Do You Need to Confirm Before Booking On-Site Printing?
- How Should You Prepare Artwork So It Prints Right the First Time?
- What Does Event T-Shirt Printing Actually Cost?
- How Do You Collect Sizes and Hand Out Shirts Without Chaos?
- What Makes Shay’s Print Shop a Fit for Event Orders?
- What I’ve Learned Running Event Shirt Orders
- Ready to Order Your Event Shirts?
- Sources
How Do You Choose Between Bulk Pre-Order, Rush Bulk, and On-Site Printing?
The right call depends on three things: how many shirts you need, how much lead time you have, and what kind of experience you want attendees to walk away with. Get those three answers first, then match them against the checklist below.
Bulk pre-order wins when you have more than two weeks before your event and know your headcount within reason. This is the cheapest route per shirt because the print shop can batch your order with efficient setups instead of rushing anything through the queue. It also gives you predictable sizing. You collect sizes ahead of time, place one order, and everything shows up boxed and ready. Conferences, fundraisers, family reunions, and company retreats almost always fit this model.
Rush bulk makes sense when your event is 3 to 10 days out and pre-ordering slipped through the cracks. You’ll pay a rush fee on top of the base garment and print cost, but you still get a full batch of matching shirts delivered before doors open. This is the fallback most planners reach for after a vendor mix-up or a last-minute headcount jump, not the plan you build around from day one.
On-site live printing earns its cost when the point isn’t just clothing attendees, it’s creating a moment. Trade show booths, festivals, and brand activations use live printing because watching a shirt get personalized in front of you is part of the draw. Live printing setups typically run 2 to 5 minutes per piece depending on the method, which caps how many people you can serve per hour but adds an experience bulk shipping can’t replicate.
Here’s a quick way to sort your event:
- Lead time over 2 weeks, headcount known, budget-conscious: bulk pre-order.
- Lead time 3 to 10 days, event date is fixed and non-negotiable: rush bulk.
- Guest engagement matters as much as the shirt, booth or festival setting: on-site live printing.
- Mixed needs (staff shirts pre-ordered, attendee shirts personalized live): combine bulk pre-order for your core run with a live station for extras.
- Uncertain final headcount and a flexible date: bulk pre-order with a buffer, not rush bulk.
How Many Shirts Should You Order and How Do You Budget for Them?
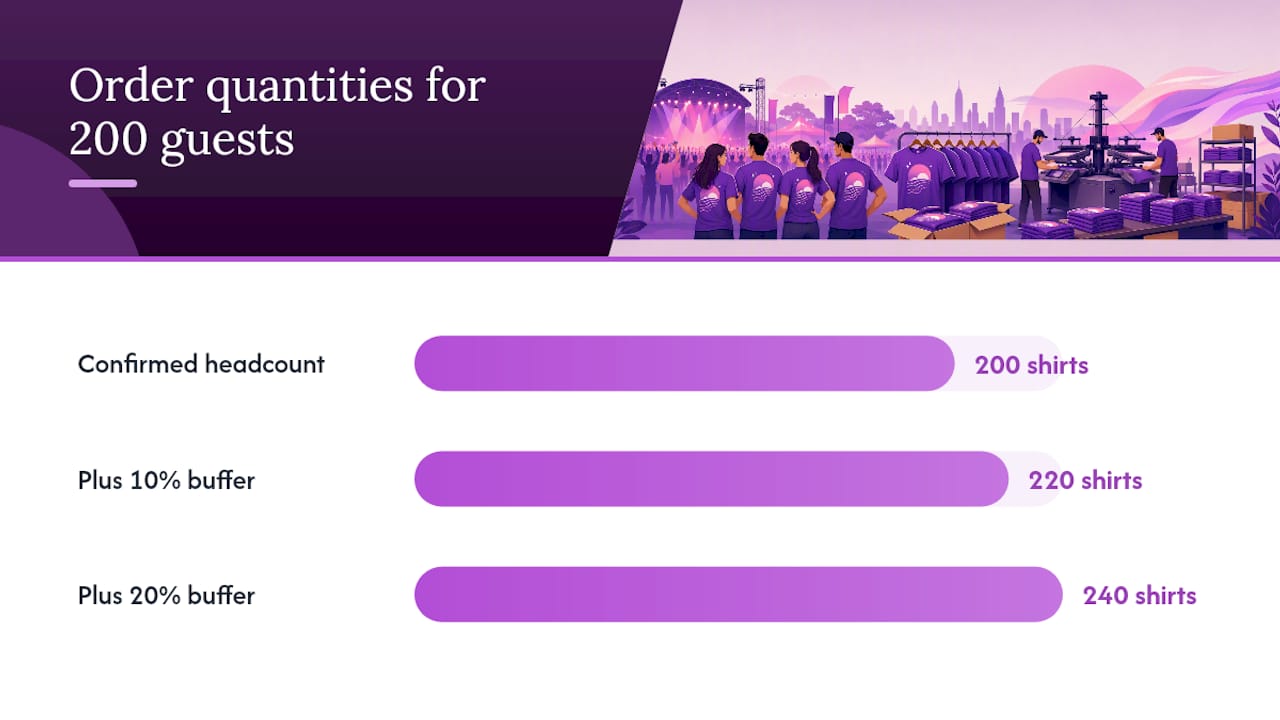
Start with your confirmed guest count, then add a buffer. Most planners land between 10% and 20% extra to cover walk-ins, size swaps, and the occasional shirt that gets stained before it’s even worn. A 200-person conference should order extra shirts to cover walk-ins, size swaps, and occasional damages, typically adding a modest buffer beyond the exact headcount.
- Lock your headcount early. The earlier you confirm numbers, the more accurate your size breakdown will be and the less you’ll overspend on a buffer built out of guesswork.
- Collect sizes with a real deadline. Give attendees a form with a hard cutoff, at least 5 to 7 days before your order needs to go in, and don’t leave “size” as an open text field. Use a standard S through 3XL dropdown so nobody writes “medium-ish.”
- Order a size-mix pack, not a flat run. Adult sizing typically skews toward M, L, and XL. A mixed-size bulk pack, like Shaysprintshop’s 10-for-$99 offering, lets you split ten shirts across the sizes your RSVP list actually needs instead of guessing on a single size.
- Request a sample or digital proof before the full run prints. This single step catches color mismatches, blurry logos, and placement errors before they multiply across 100 shirts. Shay’s Print Shop’s own turnaround guidance recommends building proof time into your schedule specifically to avoid this.
- Add up every cost category before you commit. Garment cost, print/decoration cost, shipping, and any rush fee all stack. Budgeting for the shirt alone and forgetting shipping is the most common way planners blow past their number.
The 10-for-$99 package is worth using as your baseline math. For events that require more structure around sizing and distribution, Shaysprintshop’s bulk ordering guide walks through the collection process step by step.
Pro Tip: Never skip the sample stage for a design with more than two colors or fine text. Proof approval is free time spent avoiding an expensive reprint.
Which Printing Method Should You Use for Event Shirts?
Not every printing method fits every event, and picking the wrong one is how planners end up with cracked logos three washes in. Here’s how the common methods stack up:
- Screen printing: the traditional method for large runs. Cost per shirt drops sharply as quantity climbs, which makes it a strong fit once you’re past 100 to 150 pieces with one or two ink colors. It struggles with complex, photo-realistic designs.
- DTG (direct-to-garment): prints detailed, full-color designs straight onto the fabric. It’s great for small runs or one-off personalization but slower per piece than screen printing at scale.
- DTF (direct-to-film): the design prints onto a film, then heat-presses onto the shirt. DTF handles full-color art well, works on both cotton and blends, and holds up to repeated washing better than many people expect from a transfer method. It’s a common choice for mid-size bulk orders and live event stations because setup between designs is fast.
- Heat transfer / vinyl: ideal for simple text, numbers, or single-color logos, especially for on-site personalization like adding a name or race number. Not the best choice for large, detailed graphics.
- Embroidery: best for logos on hats, polos, or jacket left-chest placements. It’s durable and premium-looking but slow and expensive for full front or back graphics on a t-shirt, so it rarely makes sense for bulk event runs.
By the numbers: PPAI’s tracking of promotional-product sales points to steady, modest growth in demand for branded event merchandise, which is one reason more vendors have added DTF and live-printing capacity in recent years instead of relying solely on traditional screen setups.
For live, on-site work, DTF and heat transfer dominate because they don’t require the multi-step screen setup and drying time that traditional screen printing needs between designs. A press station running heat transfer or DTF can move between one custom design and the next in a couple of minutes, where a live screen-printing rig usually needs a dedicated setup per design and works best when everyone at the event wants the exact same graphic.
Fabric matters too. 100% cotton takes ink cleanly across every method listed above and holds color well through washing. Poly-blend and moisture-wicking performance fabrics are trickier. DTG in particular can struggle with polyester dye migration (a faint discoloration that bleeds through the print over time), which is why cotton remains the safer default for event tees you want looking sharp in event photos six months later.
What Do You Need to Confirm Before Booking On-Site Printing?
Live printing looks effortless from the guest side of the table. Behind it sits a setup with real space, power, and staffing requirements you need to lock down before the event, not the morning of.
Space and power. A single press station typically needs a footprint of roughly 6 by 8 feet once you account for the heat press or printer, a folding table, and room for the operator to move. Most equipment runs on a standard household outlet, but confirm amperage with your vendor if you’re also running lighting or sound off the same circuit.
Staffing. Expect at least one operator per station, plus an assistant if you expect steady foot traffic. The assistant manages the line, checks design selections, and does a quick quality glance on each finished piece before handing it over.
Throughput. Speed depends heavily on method and design complexity. Simple one-color heat transfer runs faster than a detailed multi-color DTF print, and every custom name or number added on the spot adds time. Build your guest-flow expectations around your slowest likely design, not your fastest.
What the vendor typically brings versus what you supply on-site:
- Vendor supplies: press or printer equipment, blank garments (unless you’ve sourced your own), the operator, and consumables like film or ink.
- Organizer supplies: table and chairs, power access, a staging area for finished shirts, and often signage directing guest traffic to the station.
- Shared responsibility: design approval ahead of time, so the vendor arrives with pre-loaded artwork instead of building files live.
Confirm setup and teardown windows in writing. A station that takes 45 minutes to set up needs to be on-site well before doors open, and teardown eats into your venue’s exit timeline too.
How Should You Prepare Artwork So It Prints Right the First Time?
Vendors reject or delay more orders over bad files than any other single issue. Getting your art specs right upfront saves you a reprint and a missed deadline.
- Send vector files for logos and text. Formats like AI, EPS, or PDF scale cleanly to any print size. If you only have a raster image (a JPG or PNG), it needs a minimum resolution of 300 DPI at the size you intend to print, not the size it appears on your screen.
- Specify Pantone colors for screen printing. Screen printing mixes ink to match, so a Pantone (PMS) code guarantees your brand’s exact shade instead of a close guess. For DTG or DTF, work in CMYK with a standard color profile since those methods print digitally rather than mixing physical ink.
- Add a white underbase for dark garments. Any full-color design going on a black or navy shirt needs a white layer printed first so the colors sitting on top read true instead of muddy.
- Follow standard placement dimensions. A typical front chest design runs about 10 to 12 inches wide, a full front graphic closer to 12 to 14 inches, and sleeve prints stay small, generally 3 to 4 inches, to avoid wrapping awkwardly around the arm.
- Approve a digital mockup, then a physical proof if the run is large. A mockup catches placement and color issues on screen. A physical sample catches everything a screen can’t show you, like how the ink actually feels and washes on the fabric you chose.
Pro Tip: Ask your vendor for a physical proof any time your order exceeds 100 pieces or uses more than two ink colors. It costs a few days of lead time and saves you from reprinting an entire batch. Shaysprintshop’s own turnaround breakdown explains why building that proof window in matters more as order size grows.
What Does Event T-Shirt Printing Actually Cost?
Per-shirt pricing drops as quantity climbs, but the curve isn’t linear, and a few add-ons can quietly double your bill if you’re not watching for them.
Rough ranges you’ll see across vendors:
- 25 shirts: commonly $12 to $18 per shirt, since low quantities don’t unlock the deepest bulk discounts.
- 50 shirts: typically $9 to $14 per shirt as batch efficiency starts kicking in.
- 100 shirts: often $7 to $11 per shirt, where screen printing starts pulling ahead of digital methods on cost.
- 250 shirts: frequently $5 to $9 per shirt at full bulk efficiency.
These ranges shift based on garment quality, ink colors, and print method. Bulk platforms commonly unlock automatic discounts around the 20 to 25 piece mark, so even modest orders benefit from batching rather than splitting into smaller separate purchases.
What pushes your total up: rush or expedited turnaround, specialty inks like metallic or glow-in-the-dark, printing on more than one location (front and back, plus a sleeve), premium packaging, and shipping, especially if you need multiple delivery addresses instead of one bulk drop.
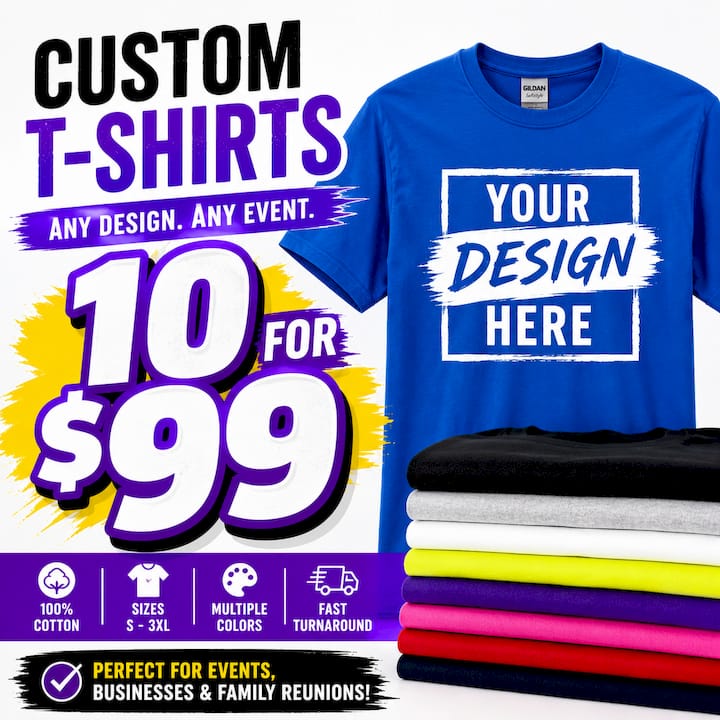
Shaysprintshop’s 10-for-$99 package works out to $9.90 per shirt, a useful benchmark for anyone comparing quotes on small runs where most vendors charge noticeably more per piece below the 25-unit mark.
Use this formula to estimate your total before you request a quote:
(Base garment cost + decoration cost + shipping + rush fee, if any) × quantity = total order cost.
Run the math before you commit, and you’ll spot a suspiciously high quote from a vendor before you’ve handed over a deposit.
How Do You Collect Sizes and Hand Out Shirts Without Chaos?
Open your size-collection form as early as your invite goes out, and close it 5 to 7 days before your print order needs to be placed. That window gives your vendor enough lead time to build an accurate size-mix pack without forcing you to guess.
- Build a simple form with four fields: name, shirt size (using a fixed dropdown, not free text), email, and pickup method (on-site pickup versus mailed).
- Calculate your buffer against the sizes you actually collected, not just total headcount. If your form shows heavy demand for L and XL, order your buffer weighted toward those sizes rather than spreading it evenly.
- Choose a distribution model that matches your event size. Small groups do fine with shirts boxed and sorted alphabetically by name. Larger events benefit from a dedicated volunteer-run pickup desk with a printed list, or scheduled pickup windows by last name or table number to avoid one long line at the exit.
- Set a clear defect and exchange policy before day one, and post it near the pickup desk: what counts as a printing defect, how attendees report it, and whether exchanges happen on-site or by mail afterward.
Conference organizers in particular benefit from scheduled distribution windows tied to session breaks rather than one mad rush at check-in. Shaysprintshop’s conference shirt guide covers distribution tactics specific to that setting.
What Makes Shay’s Print Shop a Fit for Event Orders?
Shaysprintshop builds its whole model around 100% cotton tees printed with DTF, a method chosen specifically for holding detailed, full-color art on the fabric planners actually want their guests wearing. The 10-for-$99 bulk package covers small to mid-size runs for conferences, fundraisers, and family reunions, and the custom tumbler product page gives planners a second swag option when a shirt isn’t the right fit for every attendee, staff gift, or sponsor giveaway.
Fast turnaround and the capacity to handle large orders are core parts of the service, positioned for customers who need reliable bulk fulfillment without negotiating a custom quote for every event. That combination fits three scenarios especially well: a bulk pre-order for a headcount you’ve already confirmed, a rush order when your date moved up and you need matching shirts fast, and a straightforward reorder for a recurring event like an annual reunion or fundraiser walk.
If you’re ordering for the first time, expect the process to run through uploading your own art or logo, choosing your size mix, and reviewing a proof before the full batch goes to print. That proof step matters more than it sounds. It’s the checkpoint that catches a color or placement issue before it’s replicated across your entire order.
What I’ve Learned Running Event Shirt Orders
Every event t-shirt order I’ve watched go smoothly shared the same six habits, and every one that went sideways skipped at least one of them.
- Order 3 to 4 weeks out whenever your event date allows it.
- Never skip the sample or digital proof, even when you’re confident in the design.
- Get a written sign-off from whoever approves the final art, not a verbal “looks good.”
- Keep a backup supplier in mind for anything over 150 pieces, just in case.
- Write your distribution plan before shirts arrive, not the morning of the event.
- Post clear signage at pickup so volunteers aren’t fielding the same question fifty times.
The pitfall I see most often isn’t a bad print. It’s a planner who nails the design and the vendor choice, then treats distribution as an afterthought. One fundraiser I watched had gorgeous shirts and zero plan for handing them out, which turned a 20-minute pickup window into a 90-minute bottleneck at the exit. The fix was almost embarrassingly simple: sort boxes alphabetically by last name before the doors opened, and staff two tables instead of one. Chaos ended in about 10 minutes.
The real lesson: the print is rarely the hard part. The plan around it is.
— Jon Will
Ready to Order Your Event Shirts?
Ordering takes five steps: pick your product, upload your art or logo, approve your digital proof, choose standard or rush shipping, and pay. Start with the Custom T-Shirts – 10 for $99 package if you’re planning a conference, fundraiser, or reunion run, and check the custom tumbler page if you want a second gift option for sponsors or staff. For a clear picture of how fast your order can move, review Shaysprintshop’s turnaround breakdown before you check out, then place your order with your event date already marked on the calendar.
0 comments